🧭 How do I Add or Remove an Admin User in Pequity?
Pequity allows organizations to manage user permissions to ensure the right people have access to sensitive compensation data. Admin users have the highest level of access, including the ability to manage users, configure settings, and oversee plan setup.
🧩 Add an Admin User

-
Log in to your Pequity account with an existing Admin user account.
-
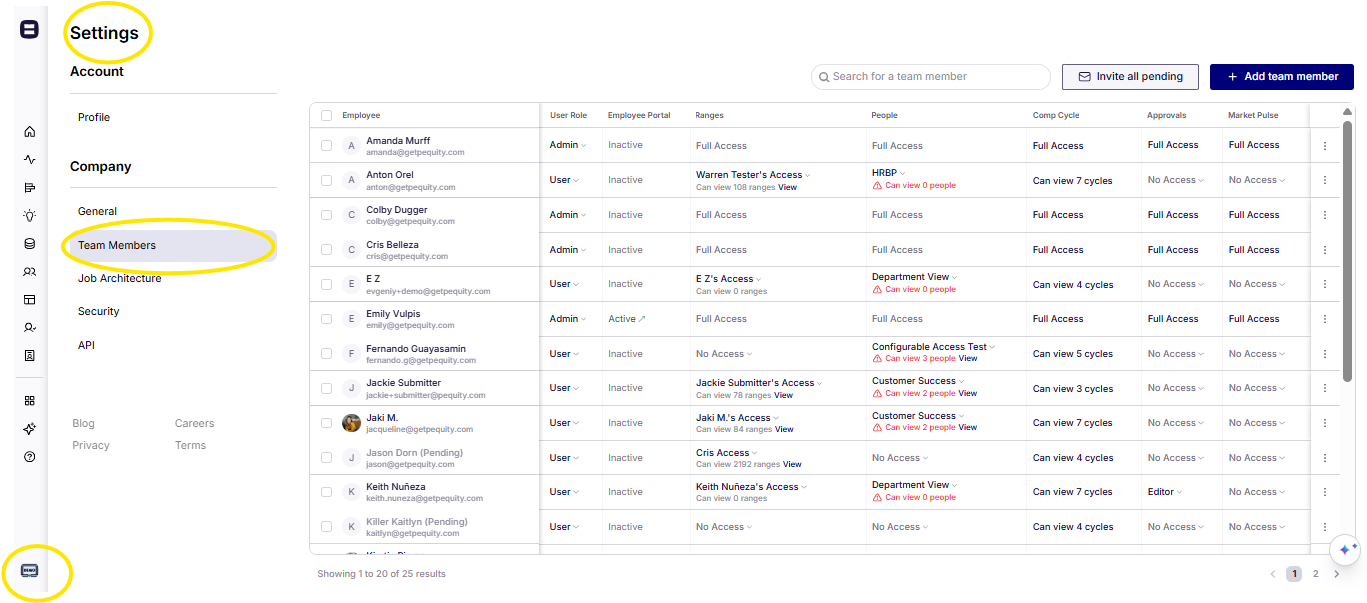
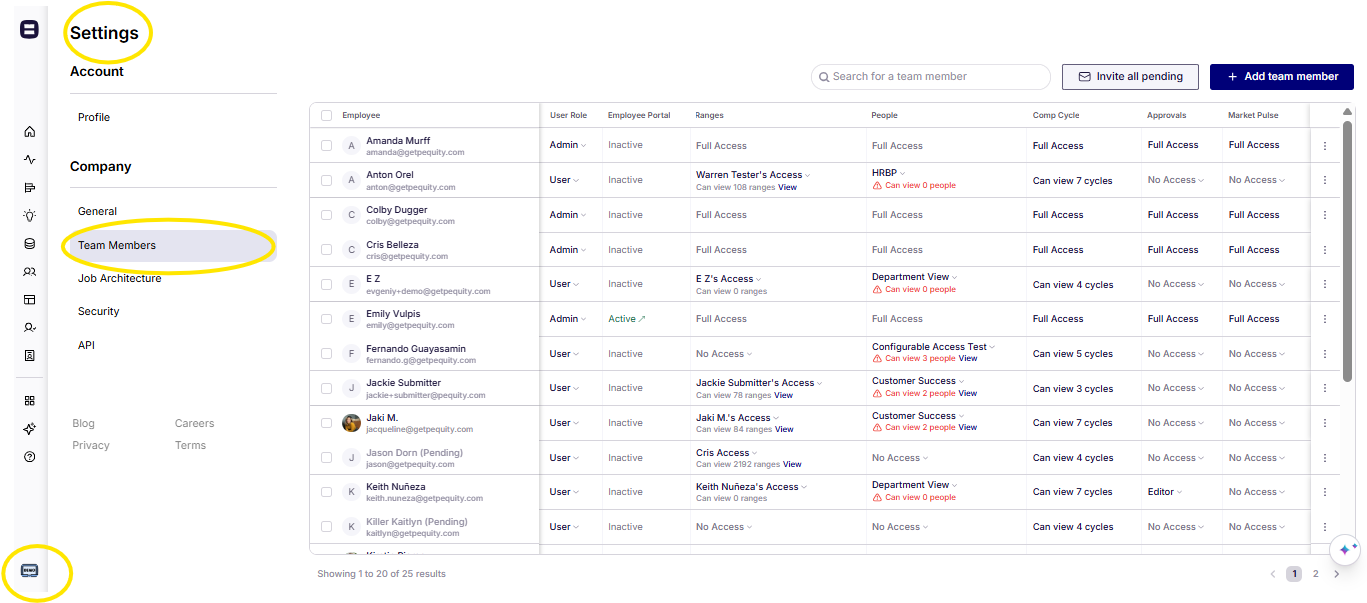
From the left-hand navigation menu, go to Settings → Users & Permissions.
-
Click Add Team Member.
-
Enter the new user’s:
-
Full name
-
Work email address
-
-
Under Role, select Admin from the dropdown menu.
-
(Optional) Assign additional permissions or business unit access if applicable.
-
Click Invite User.
The new Admin user will receive an email invitation to join Pequity. Once they accept, they’ll have full admin-level access.
💡 Tip: For security reasons, we recommend only granting Admin access to trusted members of your HR, Compensation, or People Operations teams.
🗑️ Remove an Admin User

-
Navigate to Settings → Users & Permissions.
-
Find the user you want to remove.
-
Click the three-dot menu (⋮) next to their name.
-
Select Remove User or Edit Role if you’d like to downgrade their access (e.g., to “Viewer” or “Manager”).
-
Confirm your choice in the prompt.
Once removed, the user will immediately lose access to Pequity, and their session will be terminated.
⚠️ Note: Removing an Admin cannot be undone. If you need to restore access later, you’ll need to re-invite them as a new Admin user.
🔐 Best Practices
-
Maintain at least two active Admins to avoid being locked out if one leaves the organization.
-
Review Admin access quarterly to ensure permissions remain appropriate.
-
If your organization uses SSO (Single Sign-On), confirm that the user’s SSO group also reflects their Pequity role.
🆘 Need Help?
If you encounter issues adding or removing an Admin user, please contact support@getpequity.com or reach out to your Pequity Customer Success Manager.
.png?width=202&height=50&name=Logo%20(1).png)